

This review has been a long time coming. Launched in September last year, Synology’s DiskStation DS418play NAS (network attached storage), is geared towards consumers interested in delivering high-definition media to multiple devices in their home.
You may ask “why?” After all, there’s Netflix, Apple Music and a host of other online services that render the media-minded NAS less useful in this case. But that’s not all it’s good for.
No ad to show here.
Backing up machines, saving photographs, remote downloading and data access are just some of the use cases. And really, that’s also just the tip of a very deep iceberg for those who like to be in control of the content they own.
Design
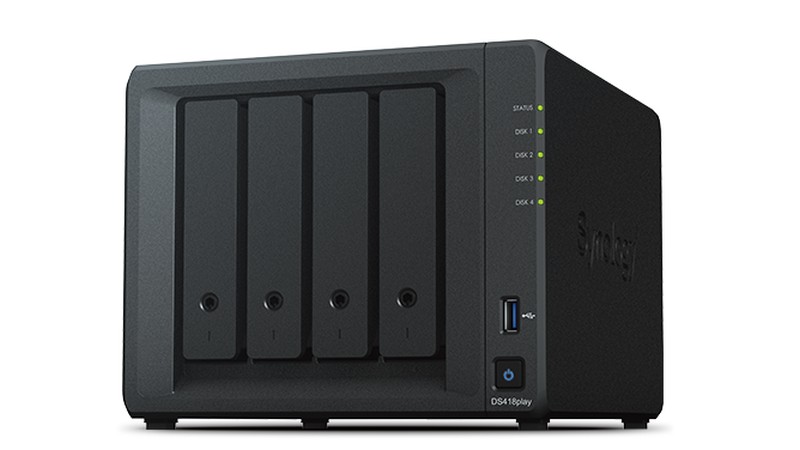
If you’re into utilitarian blocks of metal and plastic, the DS418play will tickle your fancy. It’s reminiscent of miniature ITX computers but won’t look out of place on your desk alongside your main PC.
Synology’s done a good job making it as compact as possible, as the four 3.5 inch drive bays occupy most of the NAS’s form. They’re easily accessible too, with front-mounted bays and easy-pull sleds that make changing drives easy as pie.
With that said, it still weighs 2.2Kg without any drives, and occupies an area of 17cm by 20cm by 22cm.
The DiskStation’s front-right side is occupied by indicator lights, a USB 3.0 port and a power button which glows blue when the system’s operational.
The left and right flank features an embossed Synology logo, while the rear features two large fan grilles mounted on the upper three-quarters of the NAS. Two Gigabit ethernet ports, another USB 3.0 port, and a power plug round up the simple but ergonomic design.
Of course, all this doesn’t really matter if you’re going to shove it into your roof or behind a desk.
Internals
In terms of hardware, the DS418play runs the Apollo Lake Intel Celeron J3355 dual-core, good enough for 2.0GHz without burst, and 2.5GHz with.
It’s an extremely efficient little CPU, with a TDP of 10W and a lithography of 14nm. Synology claims that without drives, the system reportedly consumes around 29W on average. For most data serving duties, it performs admirably, but we’ll talk about performance in depth later in this review.
The Celeron is mated to 2GB of DDR3L RAM, which can be expanded to 6GB if you really need. Honestly, 6GB does seem a bit much as a mere file server with the dual-core CPU, but buying an additional 2GB stick also seems rather pointless.
The NAS’s our drive bays can also support 3.5 inch or 2.5 inch drives, SSD or disks. And these can be as large as 14TB each, if you can find drives that big.
Our review unit came with two 4TB Seagate Ironwolf drives, more than enough for the average home.
Physical setup
The most difficult part of setting up Synology’s NAS is getting it out of the box. Once it’s out though, grab your drives and slide out those sleds by tugging on their latches.
Made of hardy plastic, the tool-less and screwless drive sleds feel like the cheapest components of the NAS. That’s not something you’d want to hear either, considering they’re the most essential non-hardware components. Mounting the drives required a lot of pulling, snapping, and teeth clenching.
The sleds uses tabs that snap into the loaded drives and hold them in place. But popping these tabs off of the sleds aren’t easy, nor do they inspire much confidence. I came close to snapping a tab while prying it off a sled.
At least sliding the sled back into the NAS is easy enough.
The power brick also presents another issue to South Africans. Synology bundles the NAS with a male UK plug with a female kettle adapter on its other end. If you have a spare female kettle input — the connector that most PC power supplies use — this should be a game breaker.
It’s worth noting though for those who don’t have a spare female kettle plug lying about.
Software setup
This is where it gets really easy. Synology’s software setup process is as simple as plugging the NAS into the network, opening your browser, and navigating to find.synology.com.
The service will then sweep your network looking for the Synology device, and brings up its admin page.
At this point, you’ll need to create an account, and then download the Synology DSM OS to the NAS. This, for me at least, took about 15 minutes. Installation also took a fair bit of time, but this will also depend on the drive setup you use, RAID or individual volumes.
I was set up and ready to go within half an hour.
Synology DSM OS
It’s worth the wait though, because Synology’s DSM operating system is the real attraction of the DS418play. It’s incredibly smooth, with a windowed process manager similar to Windows and Linux, and a desktop-like layout with frequently accessed shortcuts.
Keeping with modern OSes, there’s even a main menu button and taskbar.
Users navigate the OS by mouse and keyboard, while double and single clicks do exactly what you’d expect. More interestingly, users can install “Packages” which are akin to apps that add more functionality to the NAS itself.
Simply storing data isn’t all you can do with the DS418play. As it’s name suggests, it comes bundled with media Packages, including a picture manager called Moments, a music manager dubbed Audio Station, and Video Station, which manages all your bootleg TV series.
But without a doubt, my favourite Package is the Download Station.
You can schedule Linux ISOs to download after hours, and even download YouTube videos directly using just its URL. The Package does the rest for you. It’s absolute bliss.
Unlike Windows though, some Packages don’t open within DSM, instead prompting a new browser tab. This isn’t a major issue, but did get annoying when I wanted to access the Moments Package and Video Station Package from the taskbar. Only the Audio Station Package, File Station and Download Station were visible.
A slew of Packages also arrive preinstalled alongside DSM, and some may not like the bloat on the system. But it is incredibly simple for novice users, and boasts a much gentler learning curve than other NAS OSes like NAS4Free and FreeNAS.
Performance
I couldn’t push the NAS as hard as I would’ve liked. My network was the real bottleneck. However, I can say that it’ll serve a modest household well.
Playing music from the Audio Station package, copying video files to the NAS from Windows, and playing back a 720p documentary via VLC barely budged the RAM usage to 40% and were all doable on my 100Mbit network. CPU usage also remained fairly low, under 20% during this period, only shooting up to 60% when loading images in its Moments Package.
Additionally, while installing packages and updating the system was the only time I experienced lag on DSM, with windows not adjusting as quickly to clicks as before.
Transferring 2.6GB of music from my PC to the NAS over my network took about four minutes, while a 13GB video took about 20 minutes. During both instances, transfer speeds topped out at about 12MB/s.
Notably, while transferring that 13GB video from my PC to the NAS, playing another file from the NAS completely bottlenecked the 100Mbit network.
During this period, the data copying speed to the NAS never dipped below 10.5MB/s, not did CPU usage jump beyond 10%. In fact, even the RAM remained stable at 22%, all this while downloading another YouTube video from the internet. Not bad for a consumer grade NAS.
So yes, if you’e looking to play high-definition media, it’s best to upgrade your network too. Obviously expect faster network speeds over Gigabit ethernet, but that’s a luxury only some can afford.
Overall, the performance issues was due to my personal network environment and not the NAS itself.
Value for money
When buying a NAS it’s important to outline and understand your requirements beforehand. Do you simply want a standalone system to save backups? Do you want it to serve and transcode media too? Do you need to access your files from beyond the home? Are you planning to create, save or playback 4K media in the near future?
These questions will go a long way to deciding what you need in a NAS. You can then narrow down the options.
Notably, you don’t need a NAS to transcode 4K files if your PC is a monster, or if your HTPC or Android media box in your lounge is built to do just that. Nor do you need to access your files beyond the home if the NAS is simply used as a backup machine.
Overall, the Synology DiskStation DS418play is a jack of all trades. Thanks to DSM, it’ll satisfy a slew of use cases and buyers. It’s a reliable, thrifty but feature packed NAS with excellent software and off-site access through your Synology account.
But, for around R8000, the DS418play is a hefty investment, and one that shouldn’t be made lightly.
As 4K video fast becomes the norm, you may be better off building your own, more powerful rig. But if you don’t want the annoyance and frustration that involves, I can’t say that the DiskStation is a bad choice.
Final thoughts
There’s very little the Synology DiskStation DS418play can’t do. It’s energy efficient, runs cool with two drives, and boasts incredibly easy to use software. But it might be a bit too much for some people in terms of price, features, and overall storage capacity. Some may also want more processing threads or RAM.
With that said, if you have a big family and an even bigger content library, those four drive bays and intelligent management software will come in more than handy. Just make sure your network can keep up with your consumption habits.
Positives
- Sturdy, unassuming build and aesthetics
- Synology’s DSM OS is excellent
- Packages for a bevy of use cases
Negatives
- Drive sleds and tabs are finicky
- Fan noise louder than expected on low speed
- Arrived with a UK plug
Feature image: Synology