Sony launches the WF-1000XM6 in South Africa with upgraded noise cancelling, better call clarity and premium sound. Pricing starts at R7,999.
6 easy steps for turning that old-school PC into an arcade emulator


To truly appreciate the gaming world of today, we need to experience the gaming world of yesterday. Titles of the past play an enormous role in the evolution of gaming and are honestly just as fun as anything we are playing today.
PlayStation is currently working on an emulation system that will enable you to play PS1/2 games on the PS4. This alone shows you how much of a demand there still is to play old school titles. While PlayStation is busy working on this, you can take your own older PC and use it to emulate a plethora of games from various (and now defunct) gaming platforms.
Before we get in to the actual process, let me give you a brief insight into what emulation actually is. Emulation is used to play games on a platform it was not originally designed for. For instance, playing a Nintendo game on your PC. To do so, you will need an emulator and a ROM on your computer. The emulator acts as the console whereas the ROM acts as the game (cartridge, CD, etc.) Here is a quick and easy guide to follow that will have you running around in old-school retro heaven in no time flat. Also, it’s easy if not easier to emulate games on Android and iOS (jailbroken only), as it’s a case of loading up the emulator app and adding the ROM folders to a folder on the phones internal memory. The downside is that controlling via touchscreen is an awful affair, your best bet is to pair your phone with a bluetooth gamepad.
Find an old-school PC
This is the most essential part. There is not much sense in reading this article if you don’t have a free computer to run your games on. The system requirements for running most nineties consoles are laughable. We’re talking about a Pentium II being the minimum requirement to run everything from Commodore 64 games to PS2 DVD’s. An ageing laptop is also the ideal choice to use as the base of an arcade machine, but if you’re going to emulate, then it’s best to go big. Pair the computer with a 40-80GB solid state drive or if you’re cash-strapped, buy the biggest USB 3.0 drive you can and keep it permanently plugged into the computer.
Emulated games are undemanding in terms of sound, as most were made with only stereo sound in mind, with only a select few supporting multi-channel Dolby audio. Whatever sound card you have, it’s probably perfect for emulation.
It also doesn’t matter what operating system you use, as most emulators are made for Windows, Mac and Linux-based systems. Only the newer ones (like PS3 emulator) are Windows-dependant.
Get an emulator
Here are some of best emulators to use for some of the most well-known gaming systems.
- Playstation 1 – ePSXe
- PlayStation 2 – PCSX2
- Sega – KEGA
- Nintendo DS – DeSmuME
- NES – NESticle
- Super Nintendo – Snes9x
- Arcade games – MAME (Multiple Arcade Machine Emulator)
Snag yourself ROMS
ROMS are your games. They are the virtual cartridges you load into your emulator. There are two different types of ROMs, Home-brewed and official. Homebrew ROMs are games that are specifically designed to work on emulators. Official ROMs are the original cartridge or CD titles that have been converted into digital data so that you are able to play them on your PC. I won’t tell you where to get them from, or bother discussing the legality of owning them (unless you buy them from an official platform like on the Wii Shop) as no matter how you slice it, it’s pretty much illegal to download a ROM file.
In the case of MAME, PlayStation and a few other console emulators, you’ll need to download the BIOS (essentially the operating system) for each machine. Just search for the emulators BIOS files on the Googles, it’s bound to crop up.
Starting the Game
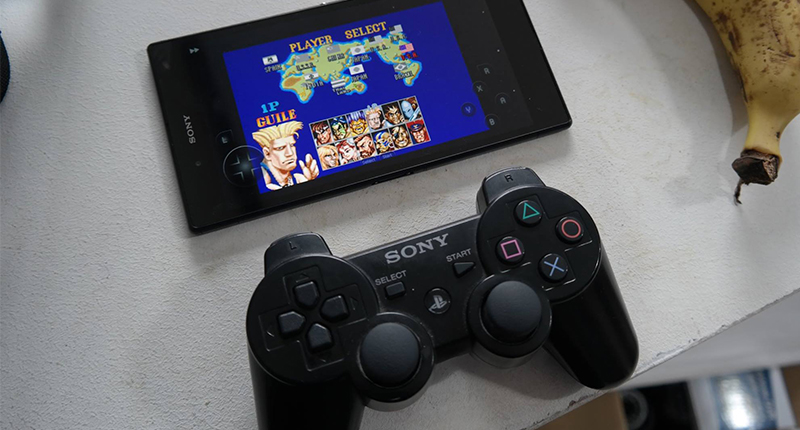
To start playing your ROM games all you need to do is open your ROM in its intended emulator, simply by dragging the ROM file and dropping it on the emulator. Or, as is the case with those who own thousands of ROM’s, place all the games into the “ROM” folder (created by default after the emulator has been installed). When the ROM’s are safely tucked away, most emulators will present them in a list format, if you’ve pointed the emulator to the folder where the ROM’s are stored.
Don’t forget to configure the controller before you begin the game. The default key settings for most emulators seem to be set by a man with fourteen fingers on each hand.
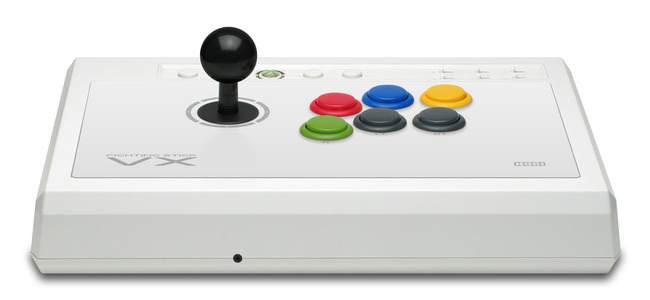
Adding a Game Controller
It isn’t necessary to get yourself a game controller as you are able to use your keyboard for every emulator. But if you really want to relive the original arcade gaming experience, you need to get yourself one. The easiest controllers to find will be the present-day controllers such as the Xbox gamepads. But for the true old-school feeling you can get yourself USB knock-offs that look exactly like the controllers of the past. Hori US has a great stock of tried-and-true joysticks for fairly affordable prices.
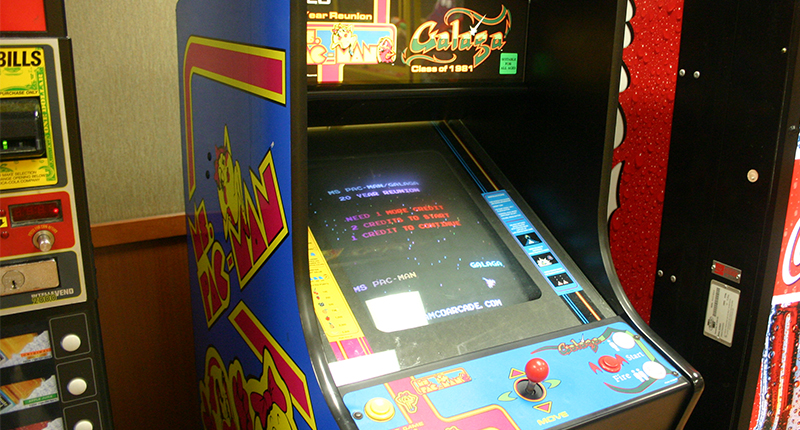
Get that arcade feel with a dusty CRT monitor
The final step to recreate the arcade experience is getting yourself a CRT monitor. This will give you that definitive arcade look and perfectly round off this blast-from-the-past experience. Grab them from eBay for under US$50.

