With stablecoins gaining traction and regulation improving, African merchants may be nearing a crypto tipping point. Here’s why 2026 could mark a shift from hesitation to adoption.
From HDMI to HTPC: how to setup a home media center


I’m getting old. Not in the sense that I battle with my hearing or that I have to start wearing glasses though. No, I’m talking about that point in your life when you’d much rather stay in and smash an entire season of Mad Men on a Friday night than go out and spend your monthly salary on tequila. Sure, tequila still features now and again in my life but not as much as Don Draper and the team from Sterling Cooper Draper Pryce.
It’s great isn’t it? The fact that you can legitimately get hold of HD episodes right after they’ve aired elsewhere in the world? Or buy a whole season of Arrested Development all at once for a price far less than what the box sets are going for in your local DVD store? Let’s not get into movies rentals: rushing to the video store only to find out that every single copy of what you wanted to watch is out, ain’t no one got time for that.
I realized that for the amount of time that I spend frolicking in the land of on-demand video content, my basic to intermediate setup that I use at home is far from what I need in terms of flexibility and awesomeness, so naturally, I did some research into the evolution of the basic home entertainment slash media centre. Little did I know what I would stumble upon. And so, here are three ways to beef up your home viewing experience, ranked in order of meat dishes. Beef, meat, hilarious.
Salami pizza (basic)
“I have a crap load of legally obtained music, movies and TV episodes on my laptop and I want to watch them on my living room TV, instead of on my laptop with earphones.”
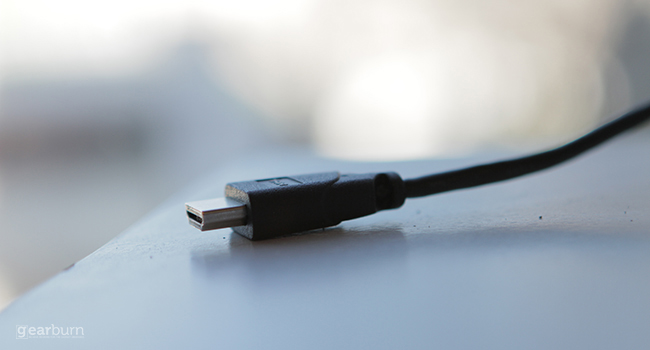
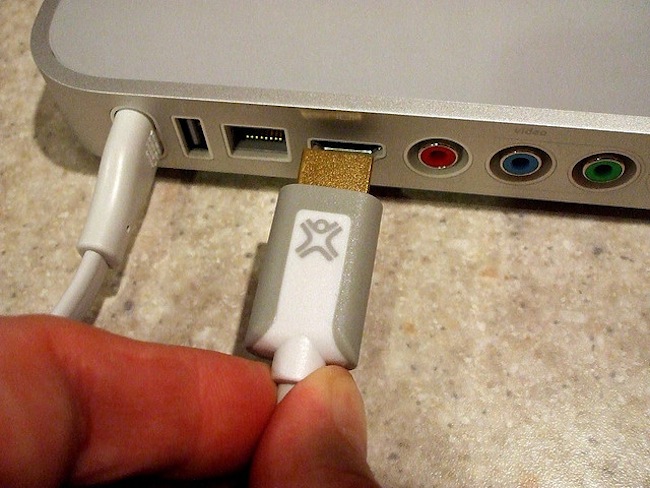
The most basic and cost-effective way of taking your entertainment collection to the next level and calling it a home theatre system would be to link your laptop to your TV with a HDMI cable. That’s it, the bare bones solution, whatever plays on your laptop screen through Windows Media Player or VLC will play on your TV screen.

You can take it a couple of steps further by installing a free media management app like XBMC or Plex, and buying a wireless keyboard and mouse (to stop you from having to control everything via your laptop) but this really is the most basic setup and should only be a temporary solution while you save up for a system that is more permanent, and less embarrassing.
Pros: little to no cost, incredibly simple to setup
Cons: unplugging your laptop every morning, tripping over cables
Leg of lamb (intermediate)
“I like consuming my digital entertainment in the lounge, but don’t want to spend too much on making it happen.”
For this type of use, I would suggest repurposing that old laptop or personal computer that hasn’t been used since you upgraded to that fancy new beast you’re currently working on. Most of them won’t have HDMI support but there are adaptors that will allow you to connect to your TV. Once you’ve sorted that out, it’s just a matter of making sure the storage is sufficient to hold onto all your content.
An app like Plex will help you manage your media without much effort and a wireless keyboard and mouse will make controlling everything that much easier. Plus, because you’re using an old system, it doesn’t need to be plugged in and out all the time.
Pros: low-cost, easy to set up, we all have old systems lying around gathering dust.
Cons: enjoyment depends on the performance of the old system, not very permanent
Beef Wellington (advanced)
“I have a massive collection of entertainment across many devices that I’m constantly adding to. Oh yes, I have some money to burn.”
Okay, so you’ve tested out the basic and intermediate solutions and like what they do for your entertainment needs, but you’re tired of having to unplug your laptop from the TV every morning before you leave for work, and tripping over cables while making your way to bed at 3AM after a rather extensive Dexter marathon has lost its novelty. How do you level up? One acronym, four words: HTPC.
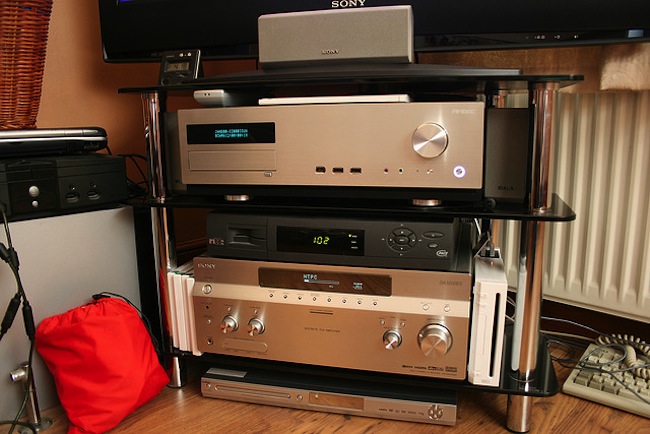
HTPC stands for home theatre personal computer, a standalone system that’s sole purpose on this earth is to curate, manage and play all of your media smoothly, without you having to worry about codecs, file names or performance. As with everything in tech, there are a number ways of achieving HTPC glory, the only limitations being price and your level of imagination.
Basically though, you want an HTPC unit that can comfortably handle anything you throw at it. The last thing you want to see when loading up your HD copy of The Hobbit is a BSOD. Lots of people who know their way around the inside of a PC will opt to build one from scratch as you can get exactly what you want, for a lot less than buying a pre-built model. There are some really awesome HTPC cases out there that will help your unit look very much at home with the rest of your home entertainment setup. Some folk even go as far as building the HTPC unit right into their TV cabinets, fans and all.

The alternative to building one yourself would be to buy one ready-made from an audiovisual store, which can end up costing you in excess of US$1000. There are some interesting looking versions of these, and a lot of them are built to take advantage of your high-end cinema projection and audio systems, which not all of us are going to need. Recently though, a lot of media centre addicts have been trialling the entry-level Apple Mac Mini’s (US$599) as HTPC units, and apparently they work very well for this, plus they’re sexy as hell and can be used as home computers. To do this, just connect it to another screen through the DVI port.
The next step would be to decide on which software you’d want to use. Earlier I mentioned free media management apps like Plex and XBMC; in this case I would opt for XBMC for the simple fact that it is completely customizable. And as it is open source, there are always enthusiasts tinkering away at it, making it capable of doing incredible things like streaming live TV or playing old video games. For me, the best thing about XBMC is the way it dynamically scrapes all the information on a particular movie, episode or song and allows you to view everything about a file; from who composed the currently playing song to interesting facts about the movie you’ve just watched.
XBMC also comes with a large library of skins that can be downloaded and applied, making the on-screen experience almost as enjoyable as the act of actually watching a brand new movie in full HD. Needless to say, all your on-demand streaming is also supported by XBMC so you can tick that box as well. There are remote apps available for most of your devices but XBMC will work with any decent universal remote available online these days.
Once you have your unit all set up and running XBMC, the next step is to link it to your network at home (pretty simple if you’re using a Mac Mini), load up your media via the built-in storage or external drives and start being entertained, it’s that easy. You’ll probably spend a fair amount of time playing with XBMC to make sure it works just like you want it to. But after, its plain sailing and 1080p streamed content until the cows come home.
Pros: complete customization, permanent solution, ability to do many things
Cons: can become very expensive and quite complicated
HDMI to Apple image by Steven Combs via Flickr.com
HTPC image by mindfieldz via Flickr.com

