ClawDBot: The AI That’s Quietly Taking Over South African WhatsApp Groups Focus keyphrase: ClawDBot WhatsApp AI Meta description: ClawDBot is the new AI bot…
How to post to Instagram from your PC

Almost a decade after its launch, Instagram updated its website to let users upload posts from a PC. You can now do this without the help of any third-party software, workarounds, or browser extensions.
Currently, this new feature is still in the testing phase and is not yet available to all Instagram users. If you are one of the lucky few, however, then please keep reading.
The feature presently only allows you to upload pics and videos for Instagram posts, meaning you won’t be able to upload Stories or Eeels, just yet.
So, in short, can you post on Instagram using a PC? Yes, but, for now, this feature is only available to certain users.
In this piece, we’ll take you through Instagram’s new PC upload feature, step by step.
If you don’t have this feature yet, make sure to read our piece on how to upload photos to Instagram using developer mode in Chrome.
How to upload photos to Instagram from your PC or MAC
First, fire up that browser and log into your Instagram account on PC or MAC.
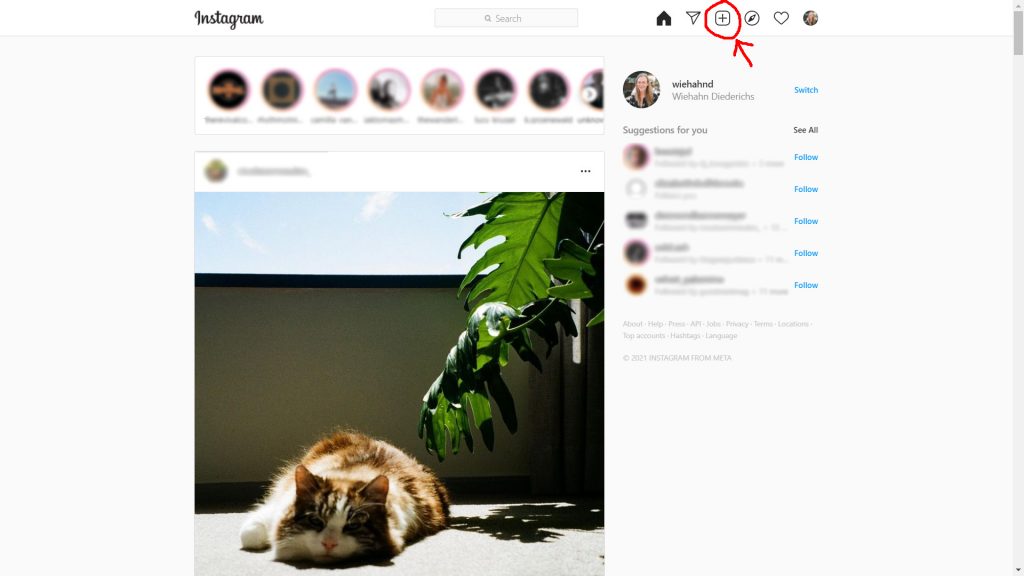
If you have access to the new upload feature, you’ll see a new “plus” icon sitting at to top-right corner of your browser window. It looks exactly the same as the icon you’ll see on your Instagram mobile app.

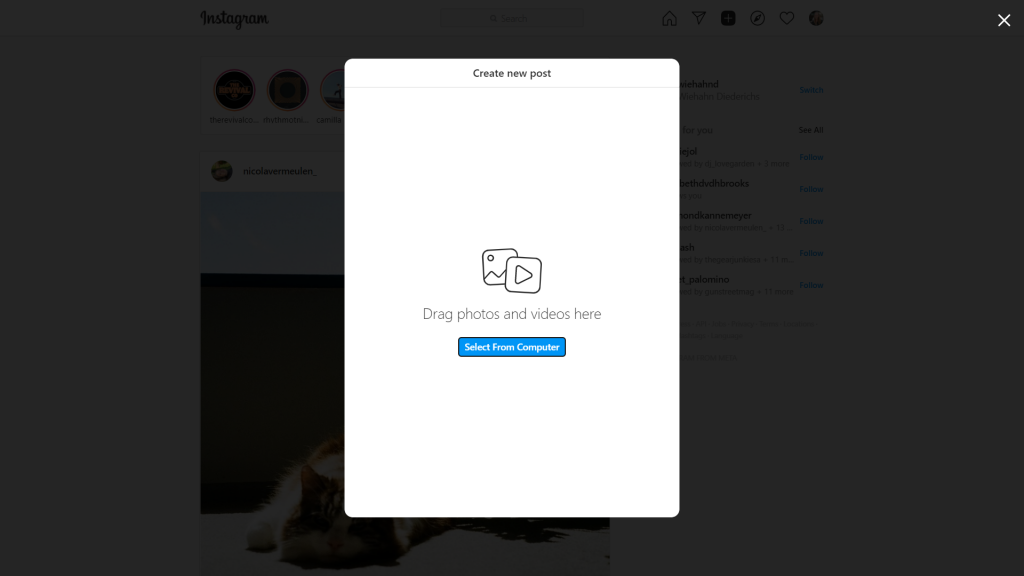
After clicking the upload button, a “create new post” pop-up window will appear and you’ll be prompted to either drag & drop images into the window, or select images from your computer.
The latter will launch your explorer window and allow you to locate and upload your pics from there.

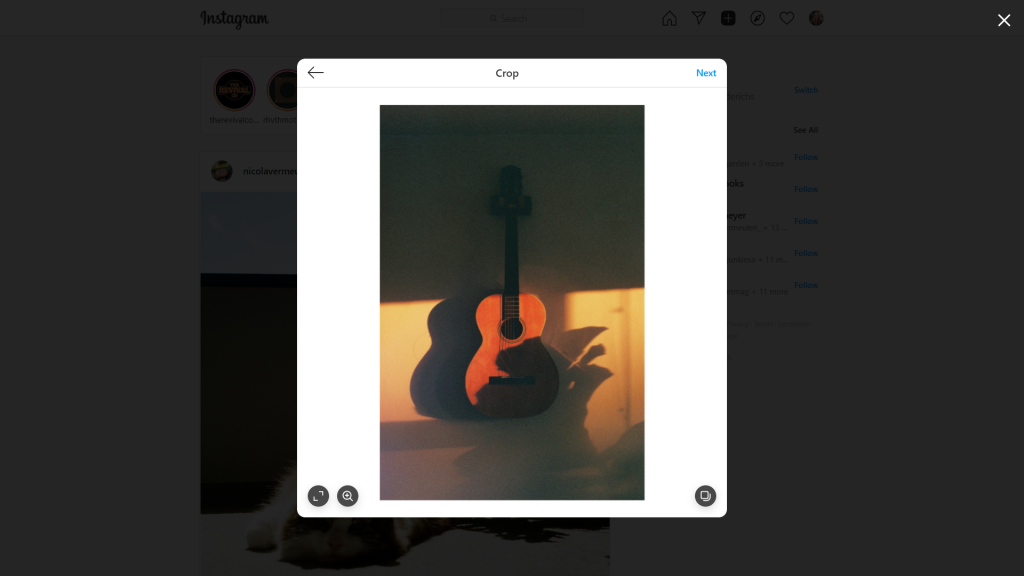
Once you’ve selected your pic, you’ll go through all the usual steps seen on your mobile app.
You can select the aspect ratio, zoom in and crop the image, and add more pics to form a carousel post.

If you’re happy with the result, you can click “next”.
In the next window, you can add a filter and edit your image settings, such as brightness, contrast, and saturation.
Once again, if you’re happy with the result, you can hit the “next” button.
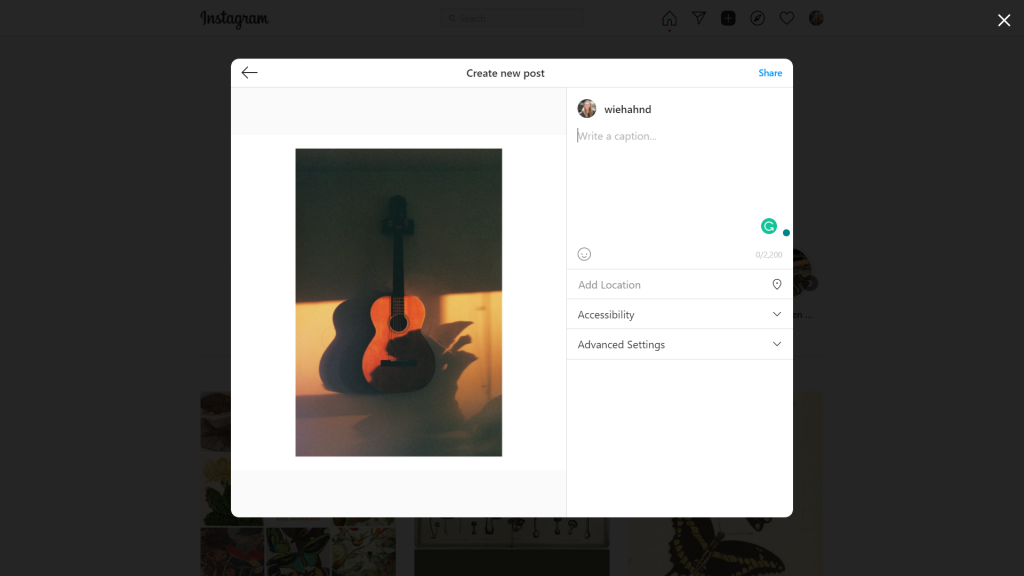
In the last window, before you upload your pic, you can start tagging people in, add your caption, tag the location, add an accessibility image description, and use the advanced features to turn the commenting option on or off.

Finally, you can hit the upload button and wait for viral fame, sending you into a bittersweet abyss of endless validation and… oh wait, my editor is saying I’m starting to go off-topic, so I think it best to end this article here.
Read more: How to add sticker links to your Instagram Stories


