MTN South Africa has once again emerged as the country’s top-performing mobile network, securing the highest score in the Q2 2025 MyBroadband Network Quality…
Here’s how to upload photos to Instagram from your PC

Instagram has become a major medium to showcase not just your photographic skills, but your personality and interests. However, while millions are using the mobile app to highlight and share their captured moments, there aren’t many features that have transitioned to the desktop version. So what if you want to post to Instagram using your PC?
The desktop version doesn’t have this function built-in yet. But you can get around it by using the developer mode in your browser.
Here’s a guide on how to post on Instagram from your computer, on both Windows and Mac…
How to post to Instagram from a Windows PC
For this method, users need to have Google Chrome installed.
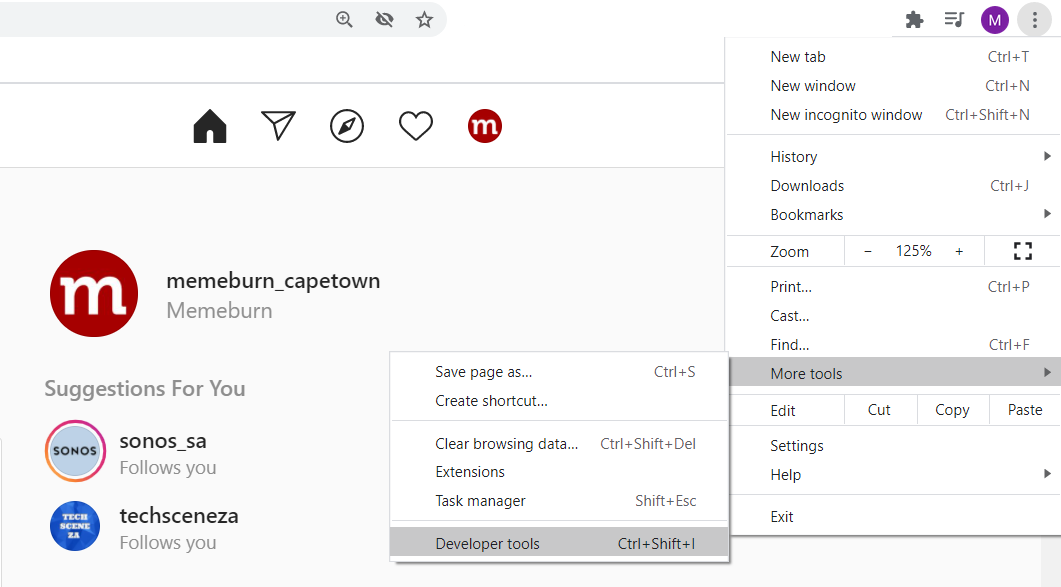
Go to the Instagram website and sign in. Once you’ve logged in, tap on the three vertical dots in the top right corner, select “More tools” and then “Developer tools”. You can also use the shortcut Ctrl+Shift+I.
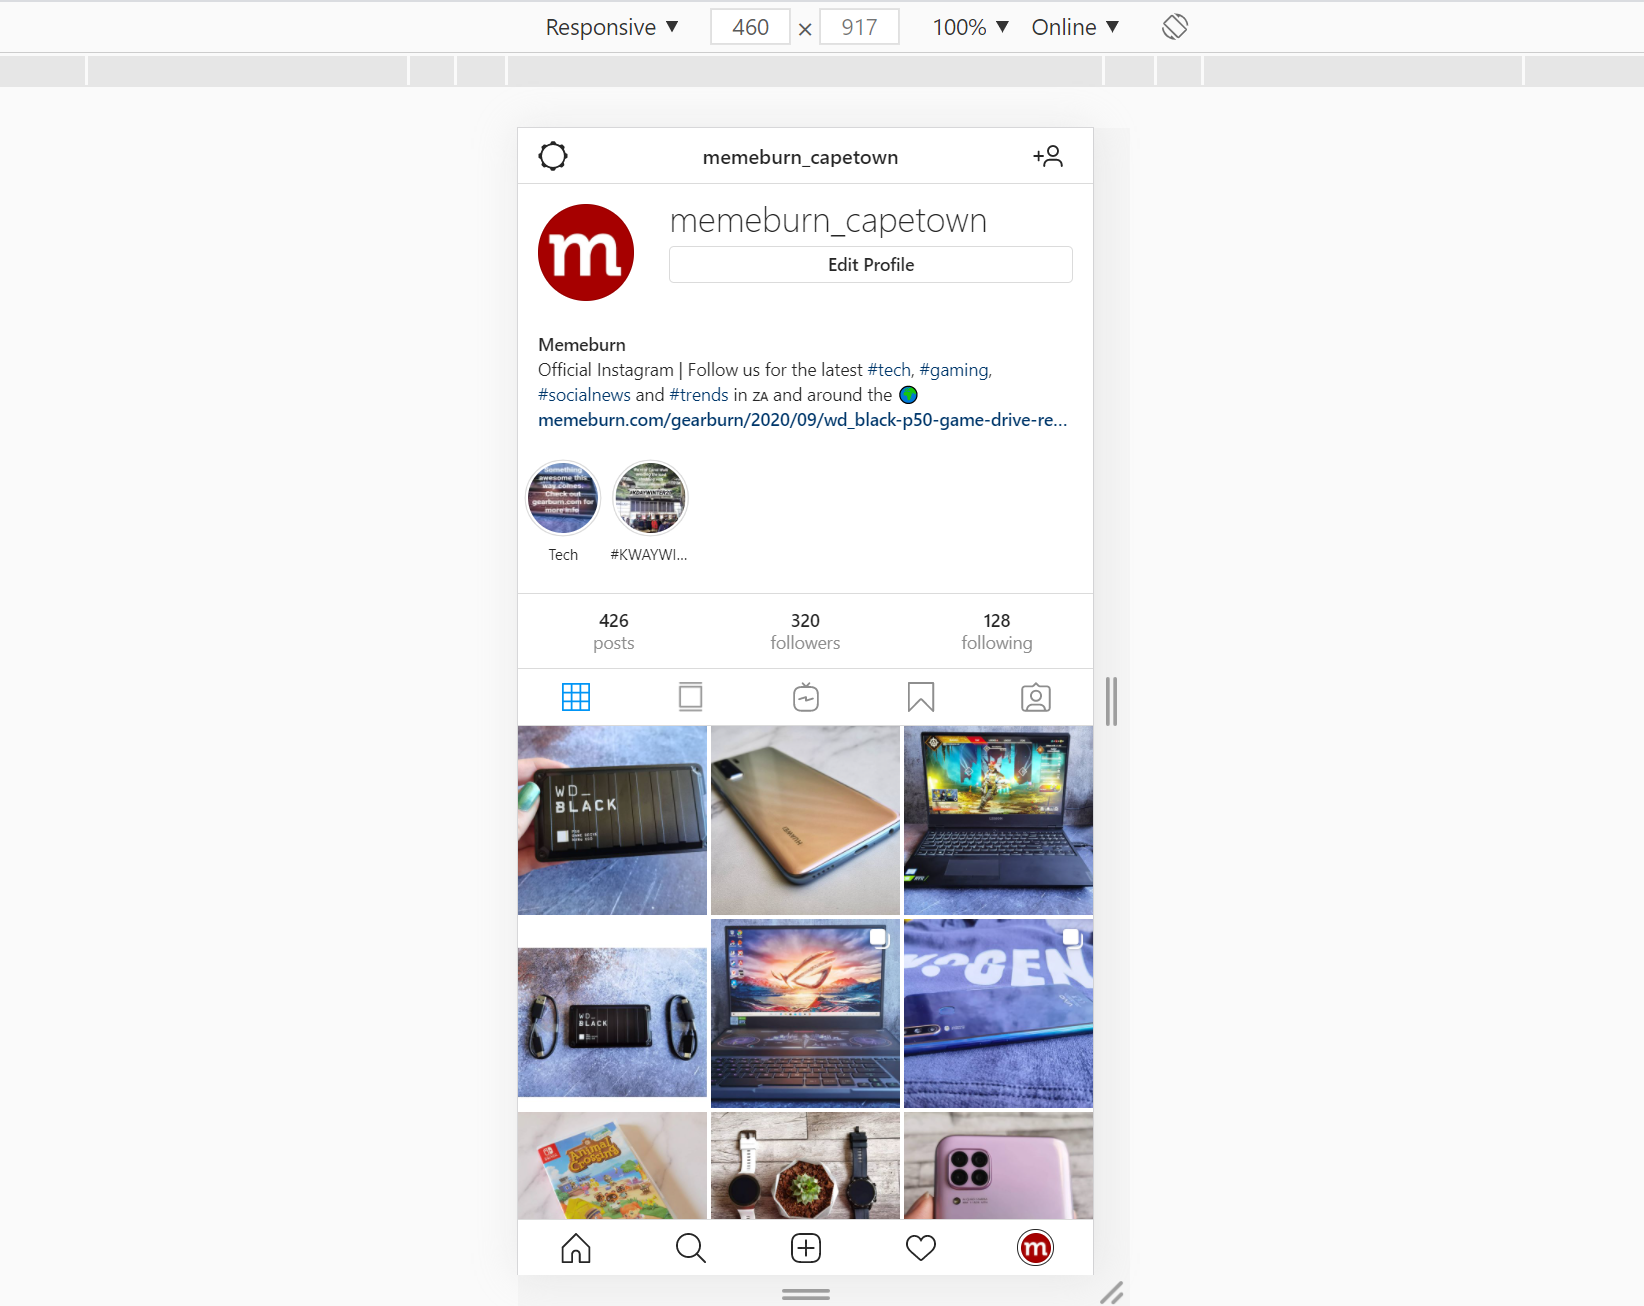
The developer’s tool window will then appear. Select the Mobile interface tab, which you can identify from an icon that looks like a phone and tablet. You can also use the keyboard shortcut Ctrl+Shift+M.
Switching to this view shows the mobile version of Instagram. Refresh the page to load the “Add” icon and lower menus available in the mobile app.
Now, you can publish your pictures and videos to Instagram on your PC. Use your mouse cursor to navigate through the app.
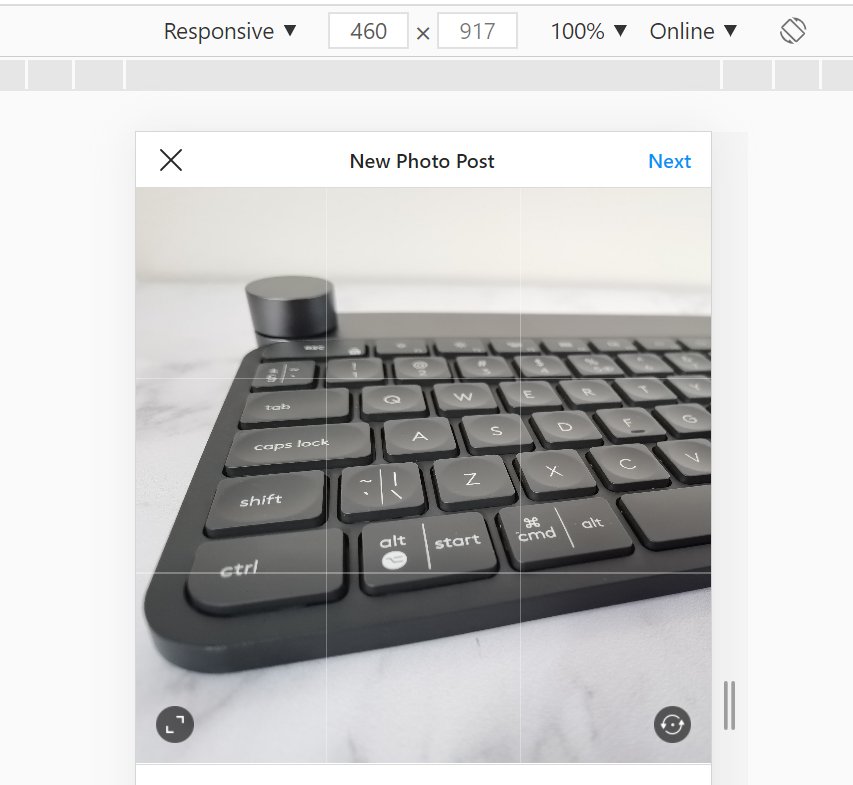
Clicking the new post icon will open a PC file upload window, just like regular computer uploads.
You can then select one or more photos to upload, and edit it as you would a regular post on the Instagram app.
You can also add images or videos to your Instagram story this way.
How to post to Instagram from a Mac
For Mac, it depends on which web browser you wish to use.
If you have Google Chrome, you will use the same method as described in the previous section.
However, if you’re using Safari as your default web browser, here’s how to publish to Instagram:
Firstly, open up Instagram in Safari and enter your login details.
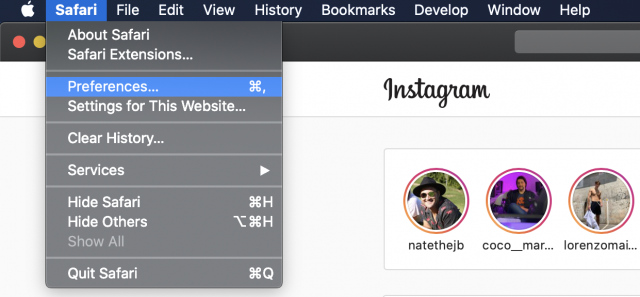
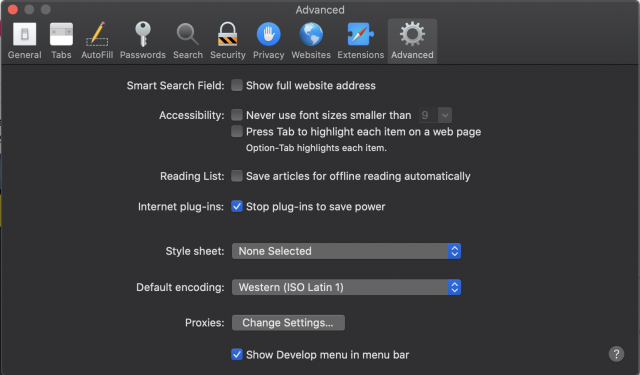
Then, head to your Preferences menu. You can use the shortcut Cmd+, to open your Preferences too.
In the popup, select the Advanced tab. Then check the box that reads “Show Develop menu in menu bar”.
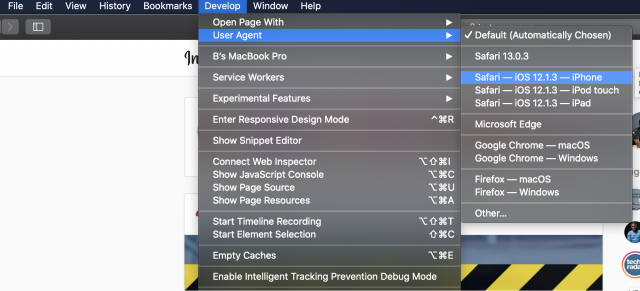
The Develop menu will now appear in the header bar, next to Bookmarks.
Go to the new menu and select User Agent. From the list of options, you can switch to an iPhone interface to access the mobile version of Instagram.
Once you have made your selection, Instagram will refresh. Now, you can upload to Instagram in a similar fashion to the mobile app.
For both methods, you can upload multiple pictures and videos or a combination of both.
Edit or delete an Instagram post on your PC
To edit or delete a post on Instagram, for both Windows and/or Mac, the methods are similar.
To edit an Instagram post:
1. Switch to the developer mobile view and select the post you wish to edit.
2. Tap on the three dots in the right corner and select Edit. From there, you can adjust your caption, and add or remove hashtags, locations and tags.
3. Once you’re done editing, select the blue checkmark in the right corner to accept the changes.
If you wish to delete a post, you can:
1. Find the post you wish to remove.
2. Open Developer mode (as explained above)
3. Select Delete and confirm the deletion by selecting Delete again.
Have fun and happy posting!
Editor’s note: Shoutout to Brendon Petersen from reframed.co for providing the Mac screenshots for this article.


